Thursday, April 30, 2015

Body Wash Revisited

Hi there!
It as been over 6 months since I began using my homemade body wash. I am here today to officially review and adjust the recipe.
My original post and recipe can be found by clicking here.

Now that it has been some time I have tweaked the recipe and found this to work best for me:


1/4 cup raw, unfiltered honey
2/3 cup Castile soap (I use Dr. Bronner's)
1/4 cup water

What changed?
-I no longer add the essential oils to the wash. Why? I feel like it was a bit pointless and a waste of precious oils. I use them so often in so many other things during my daily routines and decided I would rather not wash some down the drain. I am getting clean just fine between the honey and Castile soap... plus, the Castile soap already has essential oils included in it.
- I no longer add the almond oil. I did not feel that it was making a difference in the way my skin feels and did not want to wash it down the drain. I use lotion after I bathe and my skin feels hydrated just fine.
-I added water to the recipe. I feel like it helps stretch the use of each batch. It makes the body wash much more sudsy so I use less on my body pouf.

I recycled an agave bottle. If you feel like you still want to use EO's in your body wash please remember to use PET plastic. It is safer than glass when you are slippery in the shower and also safe for essential oil storage.

Enjoy!!
Lily Bean

Wednesday, April 29, 2015

Hair Care Update

Howdy!
It has been over 6 months since I let go of my conventional hair care products and turned to the "no-poo" way.
It is time I report back on how my hair has changed and update you on how I adjusted my recipe.

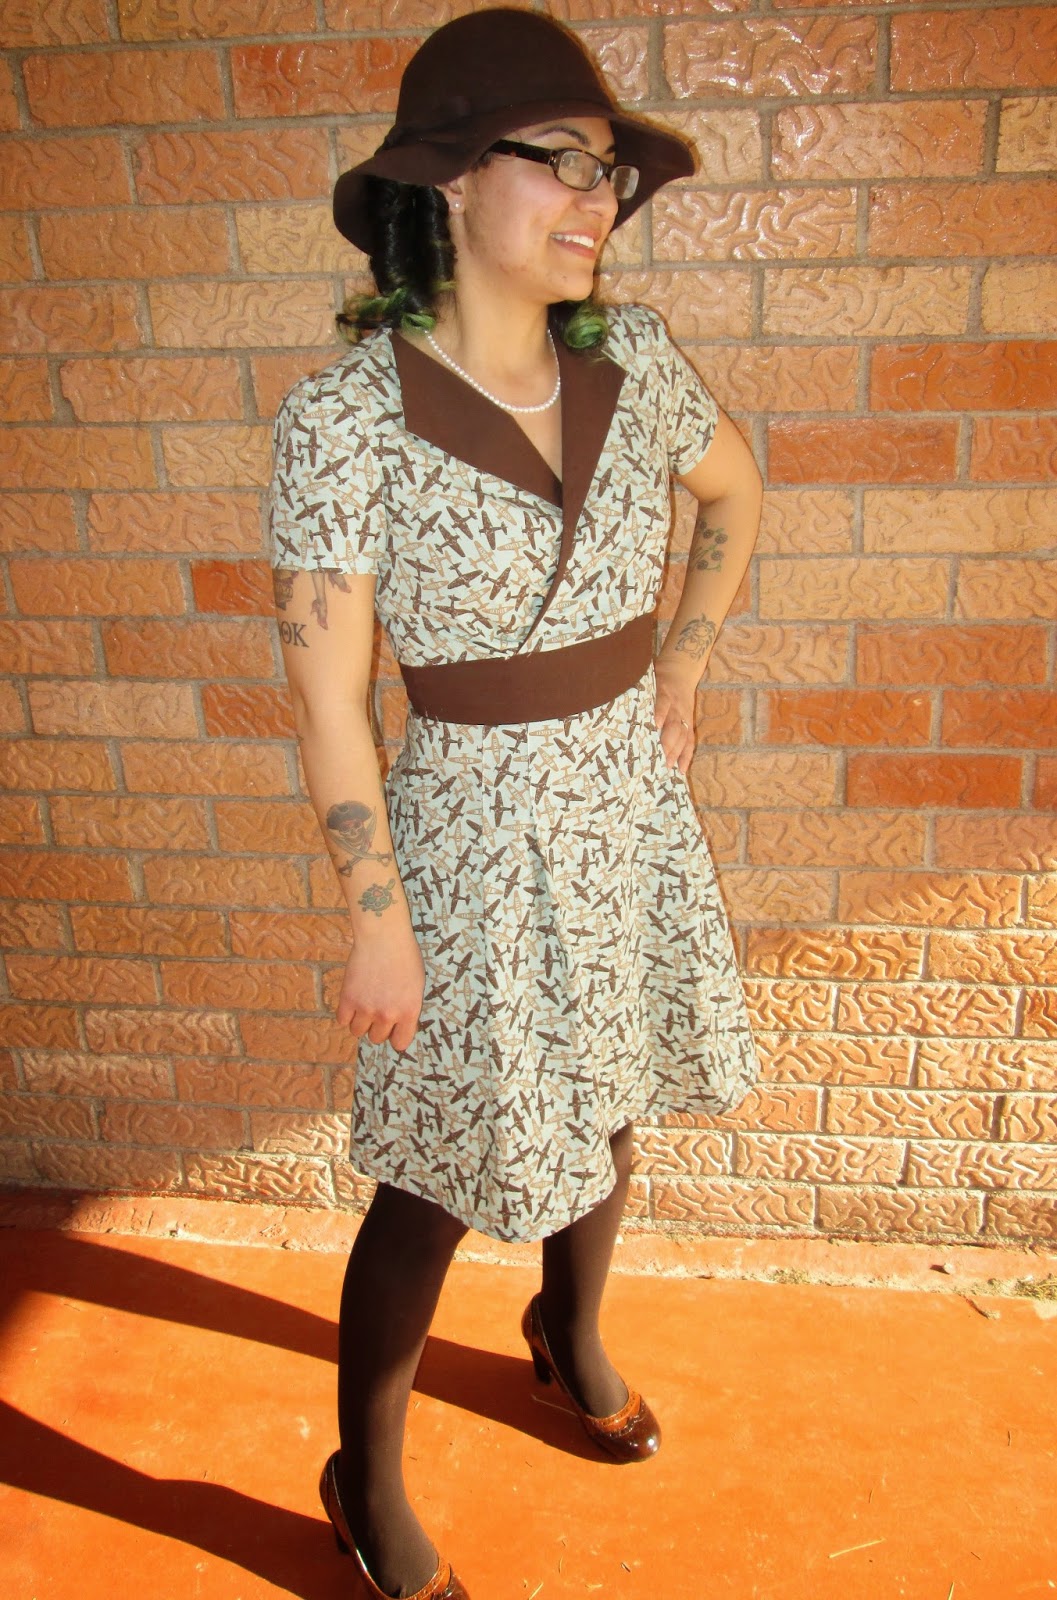
I wish I had a way to let you feel the difference in my hair. I have always struggled with frizzy hair and I would be forced to use hair serums after every wash. Ever since switching to my own recipes for hair care it is like I have new hair. My hair has never been healthier, felt softer, or been this shiny. The best thing is, I no longer have frizz!! I used to wash every 2-3 days and now only need to wash every 5-7 days, Granted, we are barely entering summer so we shall see how this goes. The only thing that is a minor struggle are my bleached ends. I have had bleached hair on and off since I was 15... only taking a break when I needed to be professional here or there. You can imagine how hard that is on my naturally pitch black strands. The bleached ends have needed to get trimmed monthly because they feel frazzled. I imagine I could figure a recipe for deep conditioning but, the truth it, I am coming to one of those "off" times where I need to be professional in a few weeks and figured I may as well slowly trim the green away to start adjusting to "normal".

I have no had any issues with styling my hair. I am accustomed to wet sets for retro curls some days and flat ironing others. None of this had been thrown off by no-poo hair care.

Do remember! When you first start your no-poo journey the road will not be easy. Your scalp is used to (insert your age here) years of constantly stripping your natural oils. When you stop using "regular" shampoo you will experience oily hair for a few weeks-to-months. Everyone's experience is a bit different but once you get passed that awful stage, you will find your glorious strands that have been buried under conventional hair products your whole life.

Here is how I care for and style my hair now:

SHAMPOO
You can find my original post and recipe by clicking here.


Updated Shampoo Recipe:
2/3 cup Castile soap (I use Dr. Bronner's)
3 tbsp baking soda
1/3 cup water

What changed?
- I no longer add essential oils to my shampoo. Why? I feel like it was a bit pointless and a waste of precious oils. I use them so often in so many other things during my daily routines and decided I would rather not wash some down the drain. I am getting clean just fine between the baking soda and Castile soap... plus, the Castile soap already has essential oils included in it.
- I adjusted the amount of water added. Adjust this to your liking. Less water makes for thicker consistency but more water makes it more sudsy and helps stretch each batch.

I love using a plastic picnic ketchup bottle since the recipe makes for thinner-than-we-are-used-to shampoo. I feel like it helps control the flow and squeeze it directly to my head instead of into my hands.


CONDITONER
To condition my hair I always rinse with equal parts apple cider vinegar and water.


I use a plastic picnic mustard bottle to control the flow and pour directly on my head instead into my hand. After I have the apple cider vinegar on my hair I use a wide tooth comb to make sure I comb it through every strand then rinse thoroughly.

FRIZZ SERUM
I hardly ever need to use serum on my hair now... hardly ever! However when I do, I turn to sweet almond oil  alone or with a few drops of "Joy" EO from Young Living added in. (I have some hair that is abused by bleach and needs some extra love sometimes.)

HAIRSPRAY
My secret sugar water! Find my post and recipe suggestion by clicking here.

XOXOX
Lily Bean


Wednesday, March 25, 2015

Spring Into This Blouse (New Look A6286)

Hi! I have been doing my best to get some weather appropriate everyday pieces sewn up lately.
You may have noticed I tend to lean towards fancier dresses... the kind that are considered everyday in Mad Men and the Stepford Wives. Although I take no issue to being overdressed (it's always better than under-dressed) I am ready to explore sewing "normal" clothes.

I mainly sew skirts and pair them with t-shirts for daily wear but I became bored of the t-shirt look. I am finally ready to expand my blouse collection. I have only made one "spaghetti strap blouse" and one 3/4 sleeve knit top.

The pattern I chose was New Look A6286 in view A


The instructions were easy to follow and the construction was very simple. I really enjoyed making it.


It ties in the back and has a loop button at the top.


 I had no trouble with the fit. The garment measurements listed on the back of the package were perfectly matched to my finished product. I love the shape and feel it is very flattering. The design is so feminine and perfect to welcome the season of Spring into my wardrobe.

XOXOX
Lily Bean


Tuesday, March 24, 2015

Jumpsuit Fail McCalls M6083

Howdy! 
Let me begin by saying the only reason this jumpsuit was a fail was due to user error.
I love, love, loooooove the way it looks on me. Do you agree?
Want to know why it is a fail?


As you can see, the cover clearly shows the jumpsuit illustrated as a loose fitting item of clothing. I thought I was real smart and decided to make it more fitted. It wasn't until I already had the majority of the construction done that I realized this was not a piece put on and then zipped up to fit... I would need to be able to squeeze in and out of it.


I am able to get myself in it and get myself out of it... it is all just a matter of some serious yoga and dancing hahaha. I am terrified to wear this very far from home. I can't imagine trying to figure my way around a public bathroom stall in this.


I am beyond disappointed because everything else is perfect. Everything except the fact that I can barely maneuver myself into or out of it.

Aside from my own shortcomings, this pattern was very simple. The instructions were not complicated at all and the construction came together easily. I urge anyone looking to make this pattern to do so. Just keep in mind that the ease was designed to be extra inches for a very important reason.

XOXOX
Lily Bean

Monday, March 23, 2015

Naturally Sweet Hair Spray

Hello everyone!
I am stopping by to share a very simple, natural hair spray recipe with you.
I am one of those girls who had shelves full of hair products... all my prized possessions and all FULL OF JUNK. Since I have made such an effort to get rid of all possible junk in my life I knew the day would come for me to let go of my hair products. I will admit, initially I stopped using them but could not get myself to actually throw them out. I needed them on my shelf as a security blanket. 
Finally, one day while reading the labels AGAIN hoping they would have magically changed to safe ingredients over night, I decided it was time. I came out of that fog and got a big garbage bag and threw out every last bottle and can. 
For a good few weeks I walked around with the same pony tail everyday because I felt like I couldn't do any style. Then I decided to research what others are doing to tame their natural mane.
Huzzah!
Naturally Sweet Hair Spray
1/2 tsp sugar for every 1 ounce water
(Add the sugar to warm water to melt it in the bottle. I have 1 ounce glass spray bottles.)


Super easy, right?!
Want more hold? Add more sugar. Want less hold? Add less sugar.
I urge you to research for yourself and do what works best for you, your hair, and your health. Some people add some alcohol as a preservative to extend the life of the product. Remember, natural means it will expire. If it smells different dump it and make a fresh batch.

What I learned worked for me:
I only make 1/2 an ounce at a time using only 1/4 tsp. This way I use it before it turns without adding alcohol.
Now I can style my hair and I feel like myself again.
(I went to Cosmetology school, hair is important to me)

If any of you have the same question as my mom: no, bees do not follow my head around all day.

XOXOX
Lily Bean

Tuesday, February 17, 2015

Foaming Hand Soap

Hi there!!
Next in like of junk-chemical item I have replaced with a natural DIY recipe is foaming hand soap. Not only is making my own hand soap cheaper, but it is also healthier. I love saving money as much as the next person but what matters most is that it is safe.


I recycled the Thieves foaming hand wash bottles once I was finished with them. I made sure to clean them very good so it would not affect the scent of the essential oils I was using.

For the soap:
3 tbsp castile soap
20 dr Lime EO
6 dr Mandarin EO
6 dr Lemon EO
8 dr Ginger EO


After you add the ingredients, fill the rest of your bottle leaving room at the top for the pump.
One pump of foam does the trick! Wash up.


Initially I had thought I would need to give a shake or swirl before each use. I have been using this DIY soap for a few weeks now and find each pump keeps it stirred up without any need to shake. I love the outdoorsy-citrus smell the blend of EOs gives the soap. Feel free to adjust the blend to your liking and have fun with it.

XOXOX
Lily Bean

Saturday, February 14, 2015

"Soft Scrub" You Can Touch

Hello there!!
I was raised using the cleaner "Soft Scrub with Bleach" to clean everything. (Sorry Mom... I will never use it again and hope you stop soon as well.) It would always leave me with a headache, irritated skin wherever it had touched, and sometimes ruined clothes. While cleaning I would have to constantly yell at my dogs to stay away or close myself into a bathroom that feels like it has no oxygen. It was never pleasant... I used to dread cleaning.

I have been working so hard to remove all harmful chemicals from my life. I am so happy with the knowledge I am gaining from my classes at the Aromahead Institute School of Essential Oil Studies. I encourage all who are interested to check out the classes offered. (The Intro to EOs is a free class.)
I follow my teacher, Andrea Butje on youtube. (Click here to see her channel). I am sharing her video with a recipe to make an all natural, soft, abrasive cleaning scrub.


I adjusted the recipe to fit my needs. This is what I used:
2 cups baking soda
6 tbsp castile soap
1/2 tbsp corn starch
2 1/2 tbsp white vinegar
30 drops lemon EO
30 drops tea tree EO
20 drops peppermint EO

The container I used was one I recycled. It was a 16oz container for my coconut flour. When I was through with the flour I saw the the plastic used was PET plastic. This type of plastic is safe for use with essential oils.

I have been using this scrub to clean the kitchen sink, kitchen counters, and bathroom and I am so happy with it. A little goes a LONG way, it smells wonderful, and best of all it is chemical free. There is no worry about the safety of my brain cells and lungs, no worry about my pups getting near me, no worry about being stuck in a bathroom full of chemical fumes. I am actually HAPPY to clean now and proud of the way it leaves surfaces. I even had some stains on the counters that have disappeared after scrubbing with this. 

I am one happy cleaning machine these days. I get excited to use my home made essential oil products. I hope you are cleaning safer and healthier as well.

XOXOX
Lily Bean

Saturday, February 7, 2015

Crafting Promotes Calm

Howdy!
I am sure you may have heard that crafting promotes a sense of calm and can be very relaxing.
I totally agree, nothing works better for me than a fun craft.
With that being said, I am so glad I was crafting last week during the super bowl game.
I was rooting for the Seahawks and they kept me on the edge of my seat. I have never yelled at the TV so much and been left so disappointed by football before. I guess that's because I never watched football until this year.

While I watching the game I was putting together two earring frames.


I needed one to put my stud earrings and one to hang my "hangy" earrings.
Each of them roughly cost about $3.
For the "hangy" earrings I used a frame from the Dollar Tree, a leopard background I had gotten by the felt pieces at Walmart, and some glittery red ribbon.


For the stud earring I used a frame from the Dollar Tree, some pink cross stitch plastic, and some pretty pink ribbon (not in first picture)


I love the way they both turned out! Now that my earrings are much more visible it will be easier to wear them more often. Not to mention they look super cute in my room.

XOXOX
Lily Bean

Friday, February 6, 2015

My Heart Takes Flight (McCall's M6503 View B)

Hi everyone!
For my first sewing post here I want to share a dress that makes my heart take flight!


McCall's M6503 in view B


This is the first dress I took serious seriously when it came to fit. I wanted to be absolutely sure I could wear this without any worries or need for an undershirt. I probably spent at least 30 mins just fitting the top.


I must admit, I didn't expect to like it half as much as I do. I struggle with fitting v-neck, wrap style tops and dresses to my body type. I am so glad I took the time to make sure it was right. I found the construction fairly simple and will be making it again.

I AM IN LOVE WITH THIS DRESS!!!

I won't have any trouble wearing it on a normal day with my white flats...
And, as you can see, I can definitely have fun dressing it up


XOXOX!
Lily Bean


Friday, January 30, 2015

Winds of Change

Hi there!
As I mentioned in a previous post, I have gone through some soul searching lately. I thought it would be good to just touch base on that before I go forward blogging here.
When I first signed up with a company for essential oils, I was encouraged to do my own research. The more I researched the more I realized it wasn't what I thought it was. I then had a fire lit under my butt to properly educate myself. I signed up for some classes through the Aromahead Institute School of Essential Oil Studies. I hope to be able to complete certification in Aromatherapy. It would be even more awesome if I could complete up to the level of Clinical Aromatherapist. No matter which level I manage to complete, it is important that I make educated decisions in essential oil usage for myself, my loved ones, and my blog followers. I do not want to steer anyone in the wrong direction where I may cause any harm. For this reason, I will no longer promote ingestion of oils or application of pure oils on your skin without first diluting with a carrier. That being said, I will still be happy to share safe recipes and uses for essential oils as I learn more. I will not be promoting any specific company to purchase from. I simply encourage you to do your research and pick a company you trust. Look into every step of their process and don't be afraid to ask questions.

As for the winds of change, I decided to extend the content of my blog to include all of my faerie life. I used to have a blog about sewing, hair, cooking, and life in general (click here for my old posts at SewingFaerie). I had become so busy finishing up my associate's degree that I lost track of posting there.

Last week I learned that I will be the sewing instructor at the new local Joann's Fabrics and Crafts. (We previously had a Joann's, but it was so small they could not house any classes. They moved to a much larger location and now classes are launching. It is the only Joann's in the city and I am super stoked to be on the team heading the first classes. This got me to thinking about how bad I wanted to share that side of my life with you also. I realize I could keep both blogs going, but I know I would struggle with keeping it all separated.

On that note, I will now be posting about my sewing adventures as well! I hope you enjoy my creations as much as I enjoy making them!

Thanks for staying tuned and being part of my faerie life!
XOXO,
Lily Bean

Thursday, January 15, 2015

Muffin Cake with Cream Cheese Frosting

Howdy! The last dessert I baked up last week (when I made the birthday brownies and almond cookies) was this muffin cake. It was my uncle's birthday and, although he asked for brownies, I was not content without a frosted cake. I went looking for recipes and decided to alter a muffin recipe and make my own cream cheese frosting. It came out quite delicious if I may say so myself.


Cake Ingredients
8 tbsp butter
1/2 cup coconut sugar
6 eggs
1 tsp pure vanilla extract
1/2 cup coconut flour
1/2 tsp baking soda
pinch of salt

In a mixing bowl, mix together the butter, eggs, and vanilla extract. In a separate bowl, whisk together the coconut sugar, coconut flour, baking soda, and salt. Slowly add the dry ingredients to the batter and mix well.
Line a bread loaf pan with parchment paper. Bake at 350 for 30-35 mins.
Let cool completely before frosting.


Frosting Ingredients
8 oz cream cheese
3 tbsp raw, unfiltered honey
1/4 tsp pure orange extract
1/8 tsp pure vanilla extract

I seriously enjoyed this muffin cake. Scrumptious addition to my after breakfast coffee break.

We will see what I bake up next!
XOXO,
Lily Bean

Wednesday, January 14, 2015

Strawberry Jamming Almond Cookies

Hi there.
When I get to baking, I don't mess around. I need to learn to pull back on the reins a bit though because it seems grain free baking has a shorter shelf life. When I was baking my uncle's birthday brownies, I also made these cookies and some "muffin cake".
There are just so many new recipes to try and I want to eat everything all in one day!
When I was little I used to looooove eating Knott's Berry Farm Shortbread cookies. I still eyeball them when I see them in vending machines. I was on a hunt for grain free cookies that can replace those. I did chose almond cookies instead of shortbread. I must say... I was not disappointed. I could eat a whole batch of these everyday...


Ingredients
2 cups almond flour
1/2 tsp baking soda
1/4 tsp finely ground sea salt
1 egg
1 1/2 tbsp pure vanilla extract
1/4 cup raw, unfiltered honey
1/4 cup butter (softened)

Mix the egg, vanilla extract, honey, and butter in a mixing bowl. In a separate bowl whisk together the almond flour, baking soda, and sea salt. Slowly add the dry ingredients to the batter and mix well.
Line cookie sheets with parchment paper. Drop by the tablespoon full and then flatten the ball of dough down. Bake at 350 for 10-12 mins. Let cool and then top with strawberry preserves or topping of your choice. This recipe will make 12-15 cookies.

Enjoy!! I will be making these again soon.
XOXO,
Lily Bean

Tuesday, January 13, 2015

Birthday Brownies

Hello!!! I feel like I have been MIA forever... I had to do some soul searching but I am back now.
Last week was my uncle's birthday. I am always in charge of desserts and birthday cakes. I haven't let going grain free limit my options and I am learning how to bake more and more grain free options.
My uncle requested brownies. I hadn't tried brownies yet and was worried it could ruin a birthday dessert... but what could be worse than the year I ruined the frosting for his cake?
I learned the hard way that you can't use granulated sugar to make cream cheese frosting HAHA. We referred to the cake that year as sand cake; it was quite crunchy and grainy. No one at the party said anything mean but I am still glad I have no shame and have the ability to laugh at myself.

So without further adieu, here's the recipe for Birthday Brownies:


Ingredients:
1 cup creamy almond butter
1/2 cup sour cream
2 eggs
1 tbsp raw, unfiltered honey
1/2 tsp apple cider vinegar
1/2 tsp baking soda
1/4 cup + 2 tbsp coconut sugar
1/2 cup unsweetened cocoa powder
3 tbsp dark chocolate chips

In your mixing bowl mix together the almond butter, sour cream, eggs, honey, and apple cider vinegar. Whisk the baking soda, coconut sugar, and cocoa powder together in a separate bowl. Slowly add the dry ingredients to the mixing bowl.

Line an 8x8 pan with parchment paper. Pour in the brownie batter and then top with chocolate chips. Bake at 350 for 25-30 mins

I want to make these again but I am thinking of 1/4 cup chocolate chips mixed into the batter instead of as a topping. Otherwise, I am super happy with how they came out. They were a bit cakier than traditional brownies but taste spectacular.

Yummy, yummy!
XOXOX
Lily Bean